
In brief:
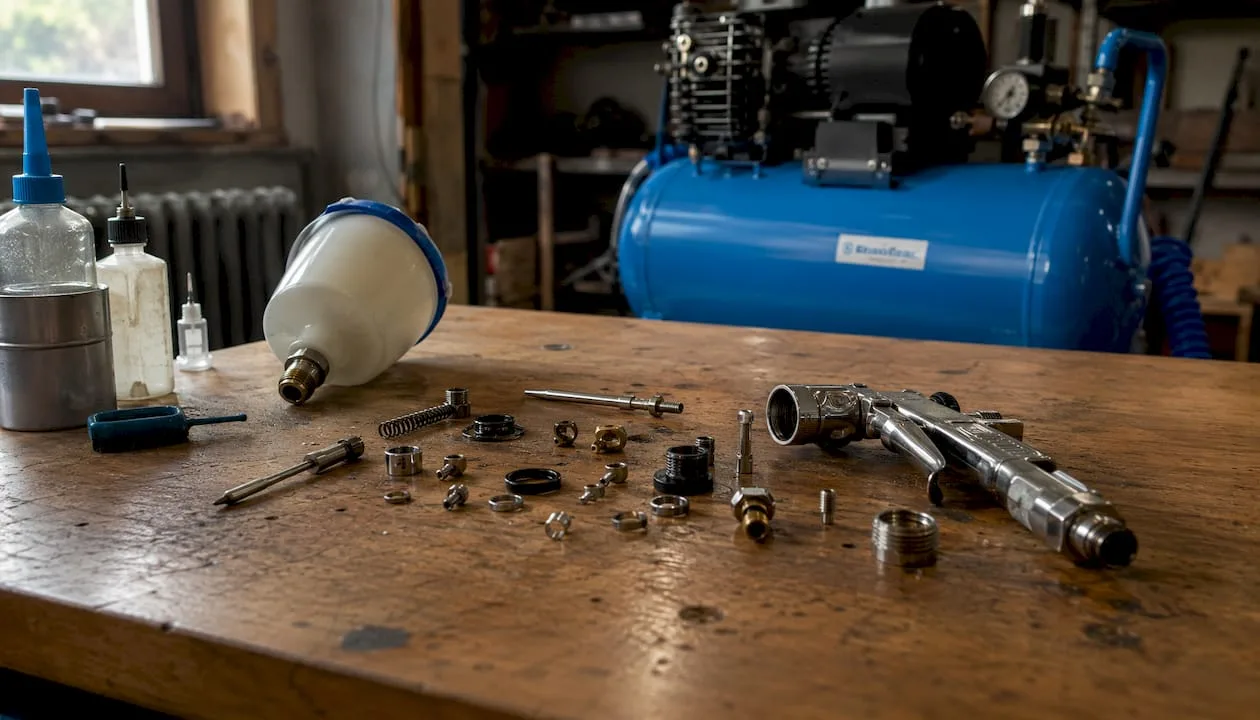
- Regular maintenance and immediate cleaning after use extend the service life of the spray gun. Before disassembly, the gun must be disconnected from the air supply, the pressure released, and protective equipment used.
The best way to keep a spray gun functional and safe is to clean it immediately after each use, regularly check the seals, and ensure clean compressed air with 3-stage filtration. Proper maintenance can significantly extend the gun's service life and permanently ensure even spray patterns.
Three steps that must not be skipped after each job:
- Immediately empty the bowl and flush the system with water (water-based paints) or the appropriate thinner (synthetic and solvent-based paints).
- Disconnect the gun from the compressed air source and release the residual pressure before any disassembly.
- Ensure clean compressed air: a 3-stage filter with pressure regulator and a hose with an inner diameter of at least 9 mm.
Contents
- Safety first: what to do before disassembly
- What tools and cleaning agents will you need?
- Detailed guide to cleaning and maintaining the spray gun
- How often should you inspect the gun and what to look for?
- How to remove clogging and other common faults of a spray gun?
- Why does clean compressed air determine the quality of the spray finish?
- How to properly store the gun after maintenance?
- Which spare parts should you always have on hand?
- Key takeaways
- Gun maintenance: what really determines the result
- Where to get parts and accessories for a spray gun?
- Useful resources and manuals
- Frequently asked questions
Safety first: what to do before disassembly
Neglecting safety steps before cleaning is the most common cause of injuries when working with pneumatic tools. Pressure in the system can cause serious injury, so the order of the steps is mandatory, not just recommended.
Protective equipment for cleaning and maintenance:
- Respirator suitable for the solvent or paint used (minimum FFP2 for organic vapours).
- Safety glasses with side shields, not just regular work glasses.
- Nitrile gloves resistant to solvents; latex is not sufficient.
- Long sleeves or a work coverall to protect the skin from overspray.
Never immerse the entire gun in aggressive solvent. Prolonged immersion will permanently damage the internal seals and the surface finish of the gun body. Clean only the parts that come into direct contact with paint.
What tools and cleaning agents will you need?
Preparing everything in advance saves time and prevents improvisation, which leads to damage to parts.
Basic tools:
- Flathead and Phillips screwdriver (size depends on the gun model).
- Box wrenches or open-end wrenches for the nozzle and air cap nuts.
- A set of fine brushes for nozzles and channels (diameters 1–4 mm).
- Bristles or thin wires for checking the patency of nozzle openings.
- Clean rags or lint-free paper towels.
Cleaning agents by paint type:
- Water-based paints (acrylic, latex): clean water, possibly a mild washing agent.
- Synthetic and alkyd paints: thinner specified in the paint manufacturer's technical data sheet (most often white spirit or mineral spirit).
- Two-component and epoxy paints: special cleaner recommended by the manufacturer, work within the time limit before gelation.
Spare parts to keep in stock:
- Set of O-rings and gaskets for the given spray gun model.
- Spare needle and nozzle (at least one complete set).
- Filters for the bowl or the spray gun's inlet filter.
- Silicone grease or lubricant recommended by the manufacturer for lubricating the needle and moving parts.
Detailed instructions for cleaning and maintaining a spray gun
The entire procedure takes 15–25 minutes with routine practice. For the first cleaning, allow more time and have the manual for your model on hand.
1. Safety preparation Disconnect the hose from the gun. Pull the trigger aimed into a waste container until all air and pressure has escaped. Put on protective equipment.
2. Emptying the bowl and flushing the system Unscrew the bowl and pour the remaining paint back into the original container. Pour cleaning agent (water or thinner) into the bowl, screw it back on, and spray into a waste container until clear liquid comes out. Repeat once or twice depending on the level of contamination.
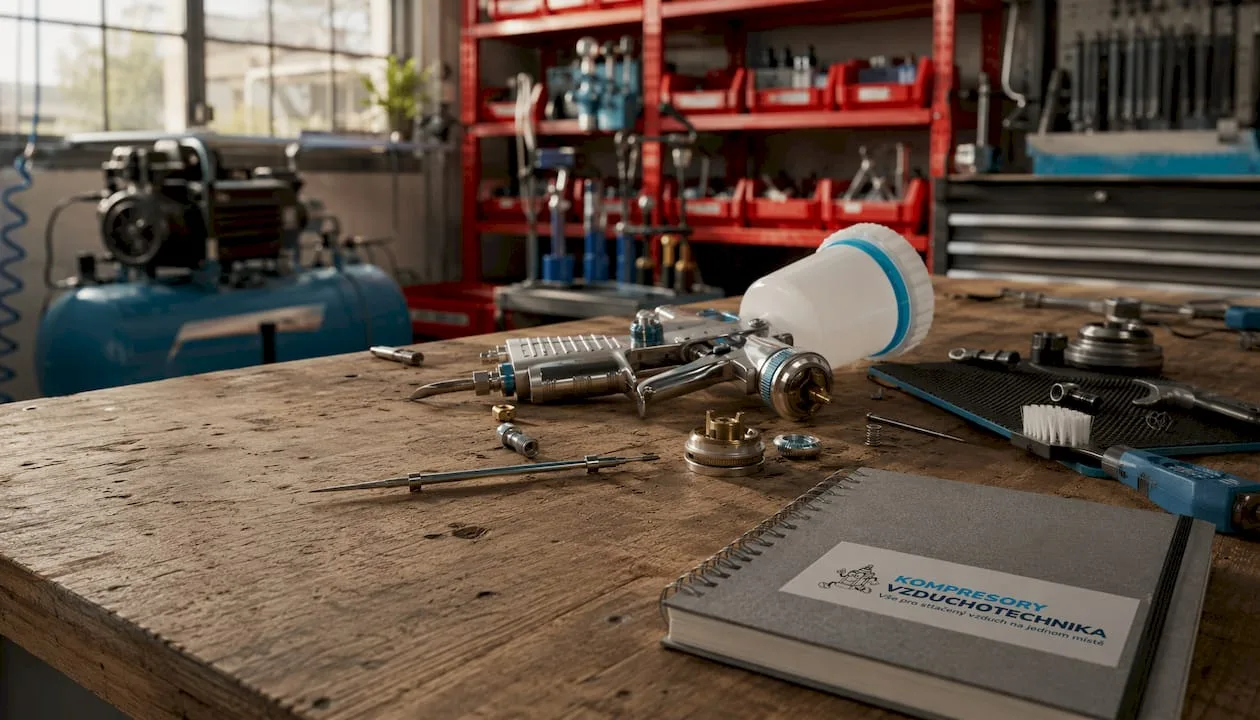
3. Disassembly and cleaning of the nozzle, needle, and air cap Unscrew the air cap and nozzle. Remove the needle after loosening the locking nut. Immerse all parts in cleaning agent in a small container (not the entire gun). Clean the nozzle channels with a brush and a thread; never use a metal wire, as it would widen the hole and permanently damage the nozzle geometry.
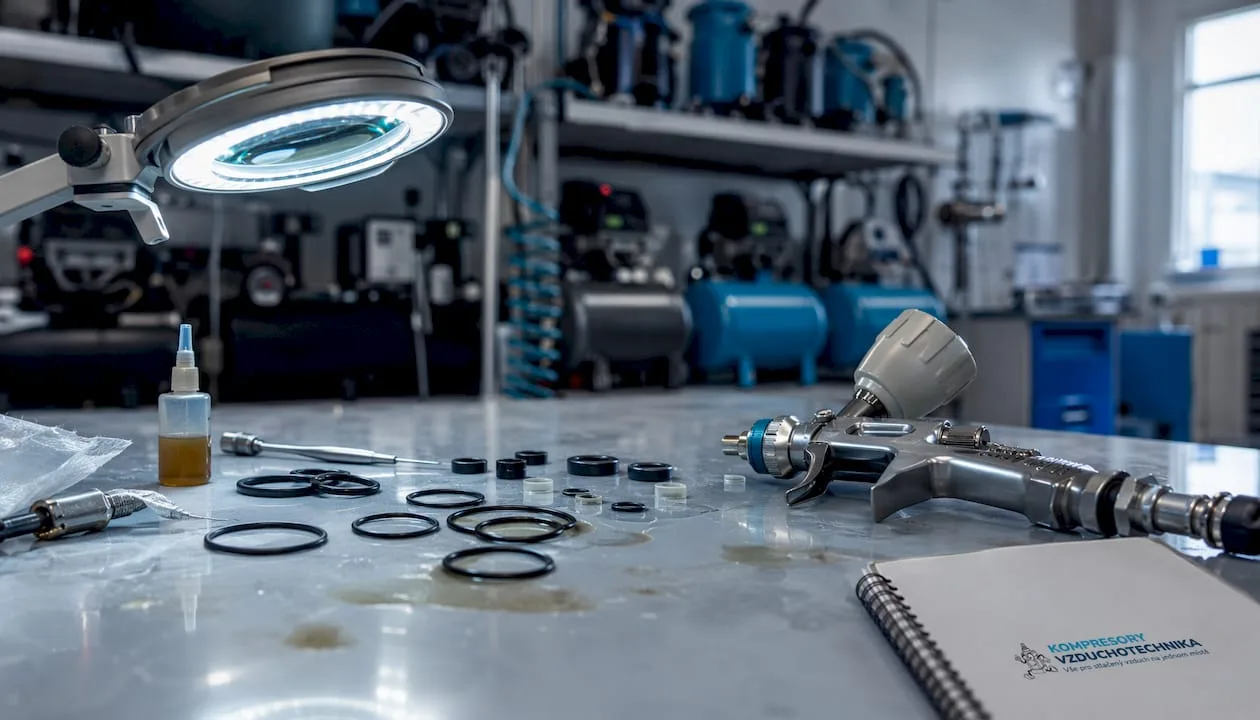
4. Checking O-rings, seals, and lubrication Inspect each O-ring and seal under good lighting. Cracks, flattening, or hardness indicate the need for replacement. Lightly coat the needle and moving parts with silicone grease. Wipe off excess grease to prevent it from getting into the paint.
5. Blowing out, checking, and assembling Briefly blow out the gun channels with compressed air (without paint). Assemble the gun in the reverse order of disassembly: needle, nozzle, air cap. Tighten the nuts firmly, but without excessive force that could damage the threads.
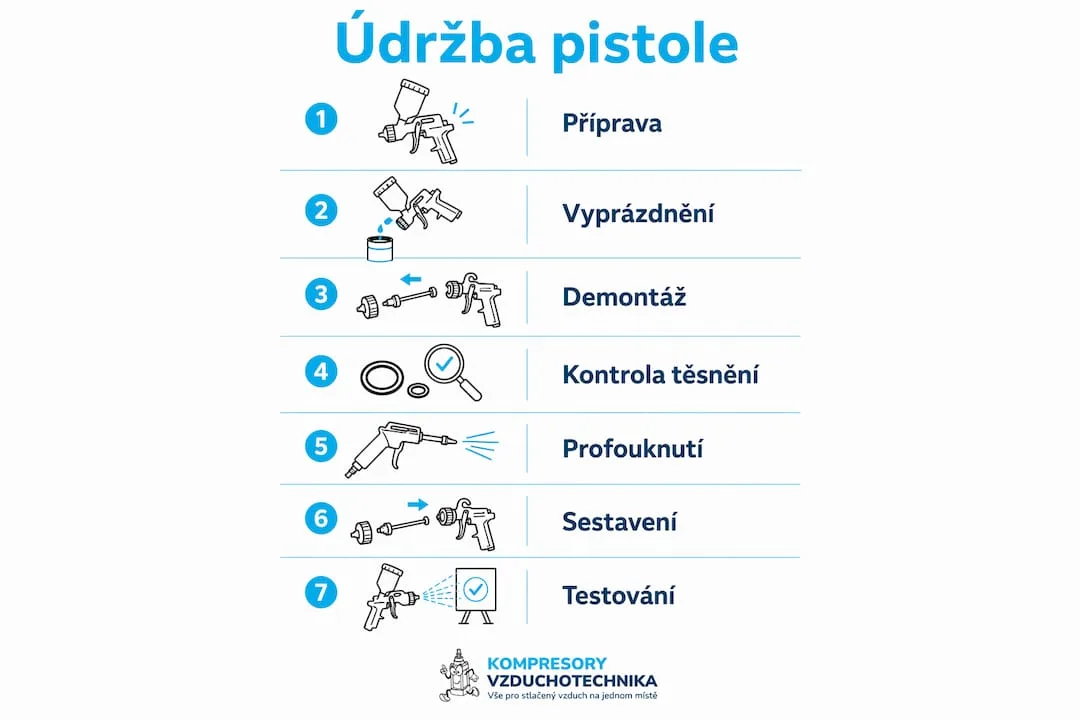
6. Checking the spray pattern Connect the hose, set the pressure, and spray a test sample onto a piece of cardboard. A correct pattern is a symmetrical ellipse without streaks, drips, or dry edges.
| Spray pattern | Probable cause | Solution |
|---|---|---|
| Symmetrical ellipse | Everything is fine | Continue working |
| Heavier on one side | Clogged air cap hole | Clean with a brush |
| Drops in the middle | Worn needle or nozzle | Replace the part |
| Dry, frayed edge | Low pressure or clogged filter | Increase pressure, check filter |
| Spray pattern too wide | Pressure too high | Reduce pressure in steps |
Professional tip: Always start with a lower pressure and increase it gradually in small increments until you achieve the correct pattern. Testing on cardboard before each job reveals nozzle wear before it shows up on the painted surface.
How often should the gun be inspected and what to check?
Regular preventive inspection is cheaper than repairs caused by neglected maintenance. The frequency depends on the intensity of use.
| Interval | What to check |
|---|---|
| After each use | Cleanliness of the nozzle, needle and bowl; system flushing |
| Daily / after each shift | Condition of seals, filter flow, joint tightness |
| Monthly | Complete disassembly, inspection of O-rings, lubrication, hose condition |
| Annually | Service inspection, pressure regulator calibration, replacement of preventive parts |
Specific inspection points for the monthly check:
- Nozzle: visual inspection of orifice edge wear; a change in the spray pattern is the first sign.
- Needle: straightness, surface free of scratches or corrosion.
- Seals and O-rings: elasticity, integrity, absence of cracks.
- Gun air filter: cleanliness of the element, absence of condensate.
- Pressure regulator: stability of the set value under flow.
- Hoses and fittings: no cracks, properly tightened, leak-free.
Keeping a simple maintenance log (date, tasks performed, parts replaced) will significantly speed up fault diagnosis and make it easier to order the correct spare parts. A table on your phone or a paper form kept with the gun is enough.
How to clear clogging and other common spray gun faults?
Most problems can be solved directly in the workshop. The key is correct diagnosis before replacing parts.
| Fault | Cause | Quick fix |
|---|---|---|
| Clogged nozzle | Dried paint in the hole | Soak in cleaning agent, clean with a cleaning needle |
| Irregular or striped spray pattern | Worn needle/nozzle, incorrect pressure | Check the parts, adjust distance and overlap — |
| Dripping from the gun | Damaged seal or loose nut | Replace the seal, tighten the material flow nut |
| Impurities in the paint | Condensate or impurities in the air | Check and replace filters, check the dryer |
| Uneven coverage | Movement too fast or pressure too low | Slow down the movement (approx. 1 m per 3 s), increase the pressure |
Signs that professional service is required:
- Cracks or deformation of the gun body.
- Damaged nozzle or air cap threads.
- The pressure regulator does not hold the set value.
- Recurring fault after replacing the seal and nozzle.
Airless spray guns have different requirements for pressure and nozzle settings. When servicing them, always follow the manual for the specific model, as the operating pressures are significantly higher than those of conventional pneumatic guns.
Why does clean compressed air determine the quality of the spray finish?
Condensate, oil and solid contaminants in compressed air directly affect paint quality: they cause craters, impurities and uneven coverage. Air filtration is not an optional extra, but a condition for reliable operation.
Recommended air treatment setup:
- Stage 1: coarse filter to capture solid particles and water droplets.
- Stage 2: fine filter for oil aerosols and fine contaminants.
- Stage 3: pressure regulator with precise pressure gauge for stable working pressure.
For industrial operations, the relevant standard is ISO 8573, which defines compressed air purity classes and determines the choice of filters and dryers. An overview of compressor filters for industry will help you select the right combination for your specific operation.
| Parameter | Minimum requirement | Note |
|---|---|---|
| Hose inner diameter | ≥ 9 mm | A smaller diameter causes a pressure drop |
| Hose design | Antistatic | Prevention of electrostatic discharge during spraying |
| Filtration | 3-stage | Filter + pressure regulator |
| Condensate drainage | Automatic or manual | Drain regularly |
Do not use a hose with an internal diameter smaller than 9 mm, even for hobby applications. A pressure drop at the end of the hose leads to an unstable spray pattern and increased paint consumption. Choosing the right hose for air distribution is therefore just as important as setting the regulator.
How to properly store the gun after maintenance?
Proper storage extends the life of the seals and protects precision parts from deformation or corrosion.
Principles of short-term and long-term storage:
- Store the gun clean, dry and at a moderate temperature (5–40 °C), away from direct sunlight and heat sources.
- Before long-term storage (more than 2–3 weeks), lightly lubricate the needle and moving parts with silicone grease.
- Remove sensitive seals and store them separately in a dry, airtight container, if recommended by the manufacturer.
- Cover the nozzle and air cap with a protective cover or wrap them in a clean cloth.
- Never store the gun with paint in the bowl; dried paint will damage the seals and clog the system.
During transport:
- Protect the nozzle and needle from mechanical damage (a rigid case or protective packaging).
- Secure moving parts to prevent unintended movement.
- Do not transport the gun with a pressurized hose connected.
Professional tip: If you don't plan to use the gun for a longer period, put a few drops of silicone oil into the bowl, briefly cycle it through and let it drain out. The internal surfaces stay protected and the seals won't dry out.
Which spare parts should you always keep on hand?
Wear parts wear out predictably. Keeping them in stock means a fault won't stop work for hours or days while waiting for a delivery.
Most frequently worn parts:
- Nozzle: wear on the edge of the opening results in a change in the spray pattern; replace at the first signs.
- Needle: grooves or corrosion on the surface cause dripping and irregular material flow.
- O-rings and seals: cracks or loss of elasticity lead to leaks and dripping.
- Gun inlet filter: clogging causes a drop in flow and unstable pressure.
How to choose the right part:
- Find the part number in the manual or on the gun's rating plate.
- Compare it with the manufacturer's or supplier's catalog.
- Prefer original kits or quality replacement parts with technical specifications (seal material, nozzle diameter).
Kompresory-vzduchotechnika offers pneumatic spray guns and accessories including technical support for selecting the right part. Before ordering, have the gun model and part number from the manual ready.
Key takeaways
Regular spray gun maintenance, immediate cleaning after use, and clean compressed air with 3-stage filtration are the three conditions that determine the reliability and service life of the gun.
| Point | Details |
|---|---|
| Immediate cleaning | Flush the system immediately after use; dried paint clogs nozzles and damages seals. |
| Safety before disassembly | Always disconnect from the air supply and release the pressure as the first step, without exception. |
| Compressed air quality | A 3-stage filter with regulator and a hose with an internal diameter of ≥ 9 mm are a prerequisite for an even spray pattern. |
| Preventive parts replacement | Keep a set of seals, a needle, and a nozzle in stock; replace at the first signs of wear. |
| Kompresory-vzduchotechnika | Offers filters, hoses, spare parts kits, and technical consultation for selecting the right solution. |
Spray gun maintenance: what really determines the result
Most spray gun problems don't arise from wear, but from neglected cleaning. A gun that is left standing with paint in the system after work will clog before any mechanical wear becomes apparent. This applies equally to hobby users and professional paint shops.
The second thing that is often underestimated is air quality. Even the best-adjusted gun with clean nozzles won't give a good result if air with condensate or oil enters it. Investment in 3-stage filtration pays off on the very first job where no re-sanding or re-painting is needed.
For professional operations, I recommend keeping records of every service intervention. In the case of a recurring fault, the record is the fastest route to diagnosis and also serves as documentation for a warranty claim or spare parts order. For hobby users, a simple date and note of the replaced part is sufficient.
When to entrust the gun to a specialist: if the fault recurs after replacing the seal and nozzle, or if the pressure regulator doesn't hold the set value, it's time for a service inspection. Fixing it at an early stage is always cheaper than replacing the entire gun.
Where to get parts and accessories for a spray gun?
Kompresory-vzduchotechnika covers the entire chain from the air source to the gun. For spraying applications, this specifically means: air treatment units, filters, hoses, and spare parts for pneumatic guns.

For hobby workshops and light professional use, compact air treatment units up to 10 bar are suitable, combining filtration and pressure regulation in one compact unit. Industrial operations will appreciate SCR screw compressors with integrated air treatment for stable and clean air throughout the shift.
Before contacting technical support, please prepare: the gun model, the part number from the manual, and a brief description of the fault or request. This shortens the consultation time and increases the accuracy of the recommendation. Kompresory-vzduchotechnika technical support is available both online and by phone.
Useful resources and manuals
Manufacturer documentation is irreplaceable in service work. General manuals can serve as orientation, but specific torque values, nozzle diameters, and seal types are always specific to the given model.
Recommended resources:
- Spray gun manufacturer's manual: download from the manufacturer's website or request at purchase; store with the device or in a digital record.
- Technical data sheet for paint or varnish: determines the correct thinner and cleaning agent; change with every new batch.
- ISO 8573 standard: reference document for industrial facilities when designing air filtration.
- Internal guide Kompresory-vzduchotechnika: step-by-step spray gun maintenance with disassembly photographs and practical tips.
| Source | Type | Use |
|---|---|---|
| Spray gun manufacturer's manual | PDF / printed | Torque values, disassembly diagram, part numbers |
| Paint technical data sheet | PDF from paint manufacturer | Correct thinner, cleaning agent, working pressure |
| ISO 8573 | Standard | Air purity classes for industrial facilities |
| Kompresory-vzduchotechnika Blog | Internal article | Practical procedures, recommended accessories |
Keep the manual for each spray gun in operation accessible directly at the equipment or in a digital record. When ordering spare parts, the part number from the manual is the fastest way to find the correct component.
Frequently Asked Questions
How to correctly set up a spray gun before use?
Start with low pressure and increase it gradually in small increments. Verify the correct setting with a test spray on cardboard: the pattern should be a symmetrical ellipse without drips or dry edges.
What should be used to clean the spray gun after work?
Clean water-based paints with water, and synthetic and alkyd paints with the thinner specified in the paint manufacturer's technical data sheet. Never immerse the entire gun in solvent; clean only the parts in contact with paint.
What pressure should be set for a spray gun?
The working pressure depends on the gun model and the paint viscosity; always follow the recommendations of both the gun manufacturer and the paint manufacturer. As a general rule, start lower and increase in steps until the spray pattern is even.
How is paint thinned for a spray gun?
Thin the paint with the thinner recommended by the paint manufacturer to the viscosity specified in the technical data sheet. The correct viscosity can be verified with a flow cup (most commonly Ford Cup No. 4); paint that is too thick clogs the nozzles, while paint that is too thin causes runs.
How to remove a clogged spray gun nozzle?
Remove the nozzle, soak it in the appropriate cleaning agent, and clean the channels with a soft brush or cleaning wire. Never use a metal wire, as it would widen the nozzle opening and permanently alter the spray pattern.