

TL;DR:
- Bleeding a compressor is necessary before every service to prevent damage and hazards. Technicians must carry out gradual depressurization, drain the condensate, and check the system for leaks. Regular maintenance extends the service life of the equipment and minimizes repair costs.
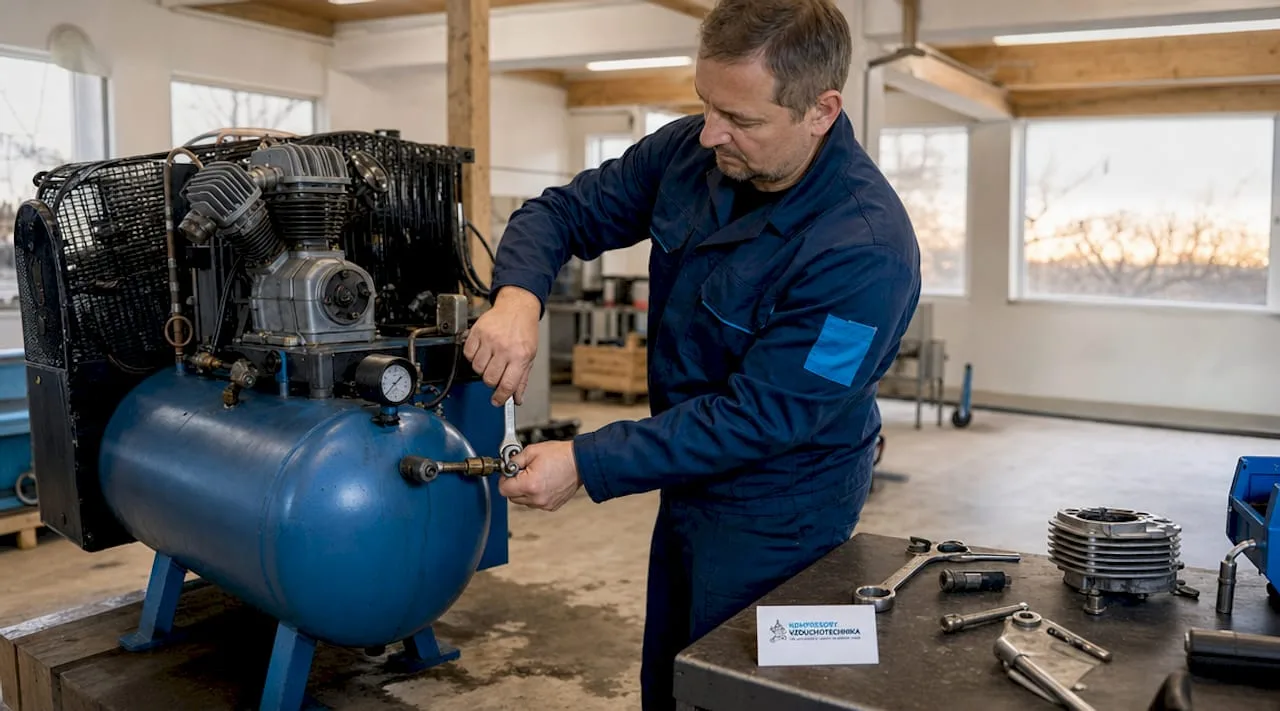
Bleeding a compressor is the process of controlled release of residual pressure from the air tank and piping system, which prevents mechanical damage, corrosion, and safety hazards during maintenance. The correct bleeding procedure for a compressor is not an optional step. It is a prerequisite for every service intervention, filter replacement, or valve inspection. Technicians who skip this step or perform it incorrectly risk damaging seals, causing pressure surges in the piping, or serious injury. This guide covers preparation, the step-by-step procedure itself, common issues, and recommendations for regular maintenance after bleeding.
What do you need before bleeding a compressor?
Proper preparation determines whether the bleeding process will go smoothly. Safety measures such as gradual depressurization and disconnecting the power supply are necessary to prevent injury and equipment damage. Before starting work, gather the following equipment and follow the rules below.
Required tools and equipment:
- Flat or hex key for bleed valves (size depends on compressor type)
- Pressure gauge for checking residual pressure in the system
- A set of bleed keys or a special bleeder for screw compressors
- Safety glasses and work gloves
- A container or hose to collect condensate from the air tank
- Manufacturer's service documentation for the specific compressor model
Safety rules without exception:
- Disconnect the electrical power supply and ensure that the compressor cannot start up on its own.
- Never begin venting at full operating pressure. Release the pressure gradually to prevent a sudden failure and damage to components.
- If you are working on a vehicle's air suspension compressor, support the vehicle before starting work to avoid damaging the springs or the compressor.
- Check that all air lines and fittings are in good condition before opening the valves.
Professional tip: Before every venting operation, check the current pressure value on the pressure gauge. If the pressure gauge shows zero but you can hear air hissing, the valve is leaking and the system is still holding residual pressure. Never rely on visual inspection alone.
Choosing the right tools and knowing the specifics of individual compressor types is key for effective venting and for selecting the right compressor for a given application.


How to vent a compressor step by step?
The procedure differs depending on the type of compressor. Piston compressors with an air tank have a different venting valve than screw compressors with an integrated oil separator. The procedure below serves as a general basis. Always supplement it with the specifics from the manufacturer's documentation.
General procedure for venting an air compressor:
- Switch off the compressor and disconnect the power cable from the outlet, or secure the main switch in the OFF position.
- Wait for the compressor to cool down if it has been in operation. Hot surfaces and hot condensate increase the risk of burns.
- Check the pressure gauge and record the current system pressure. The operating pressure of piston compressors typically ranges between 8 and 10 bar, while for screw compressors it ranges between 7 and 13 bar.
- Open the air receiver's drain valve slowly and gradually. Turn the valve by no more than a quarter turn at a time and monitor the pressure drop on the pressure gauge. Opening the valve suddenly causes shocks in the piping and can damage the seals.
- Drain the condensate from the air receiver. The condensate contains water and oil. Collect it in a container and dispose of it in accordance with local regulations for the disposal of waste oils.
- Check that the pressure gauge reads zero and that the hissing of air has stopped. Only then proceed with the service work.
- For screw compressors, verify that the oil separator and oil circuit are also depressurized. Screw compressors have a separate drain valve on the oil separator, which must be opened separately.
- After completing the service work, close all drain valves, check the tightness of the connections, and only then switch on the power supply.
Professional tip: For SCR screw compressors and similar industrial machines, always also vent the pipework downstream of the discharge valve. Air trapped in the pipework causes a backlash when restarting and shortens the service life of the discharge valve.
Comparison of the procedure for different types of compressors
| Compressor type | Drain valve | Procedure specifics |
|---|---|---|
| Piston compressor with air receiver | Manual cock or ball valve on the air tank | Drain the condensate, check the check valve |
| Rotary screw | Valve on the oil separator and discharge piping | Vent the oil circuit and the air circuit separately |
| Oil-free piston | Vent valve on the air tank | No oil condensate, but moisture check is mandatory |
| Air suspension compressor | Valve on the air bellows or distributor | Support the vehicle, vent each air bellows individually |
Regular and systematic venting and quarterly maintenance significantly extend the compressor's service life and reduce operating costs.
What problems can occur during compressor depressurization?
Depressurizing a compressor looks simple, but in practice there are several typical mistakes that lead to equipment damage or injury. The most common maintenance mistakes can significantly reduce performance and increase repair costs.
Typical mistakes and their consequences:
- Opening the valve too quickly. A sudden pressure drop causes a hydraulic shock in the piping, damages seals, and can pull fittings out of their threads.
- Depressurizing without disconnecting the power supply. The compressor may start up on its own and immediately re-pressurize the system, endangering the operator.
- Ignoring residual pressure. The pressure gauge may read zero, but residual pressure can remain in the oil separator or in the air tanks. Always physically check for the hissing sound of air.
- Failing to drain the condensate. Water in the air receiver causes corrosion, contaminates the air, and shortens the compressor's service life.
- Overlooking the oil circuit on screw compressors. Pressure in the oil circuit can cause oil to spray out when the separator cover is opened.
A burnt-out compressor signals serious problems in the system. Typical signs of a fault include the smell of burning, discoloration of the metal housing, and damage to the air tubing. These signs can be a direct result of improper depressurization or an air leak.
When installing a new compressor or after a repair, it is advisable to also replace the starting relay. Excessive or continuous compressor operation causes premature failure, which can be prevented by replacing protective components during every major service action.
Compressor diagnostics before and after depressurization help increase operational reliability and detect leaks or other faults early. Technicians who perform diagnostics systematically catch problems before they cause costly failures.
Recommended procedure for regular maintenance after depressurization
Bleeding is part of a broader compressor maintenance procedure. Simply releasing the pressure is not enough. After every bleeding and service intervention, control tasks must be carried out to ensure correct operation of the equipment until the next service.
Quarterly maintenance tasks after bleeding:
- Replace the filter element of the oil and water separator. Replacing the filter element and regularly checking the oil and water separator significantly affects the quality of the compressed air and the reliability of the compressor.
- Clean the intake filter screen. A clogged screen increases the compressor's power consumption and reduces air flow.
- Check and adjust the bypass valve. An incorrectly set bypass valve causes overpressure or insufficient pressure in the system.
- Check the tightness of all joints and fittings after bleeding. Use a soap solution or an electronic air leak detector.
- Record the service date, measured pressure values, and filter condition in the compressor service log.
Comparison of quarterly and annual compressor maintenance
| Task | Quarterly interval | Annual interval |
|---|---|---|
| Replacement of the separator filter element | Mandatory | Mandatory |
| Bypass valve inspection | Visual inspection and adjustment | Complete overhaul or replacement |
| Oil change (screw compressors) | Level and quality check | Complete oil change |
| Belt and coupling inspection | Visual tension inspection | Wear measurement, replacement if necessary |
| Safety valve inspection | Functional test | Calibration test or replacement |
| Cooler cleaning | Blowing with compressed air | Chemical cleaning or replacement |
Regular maintenance according to this schedule extends the lifespan of the compressor and reduces the risk of unplanned downtime. Technicians who keep a service log have an overview of the equipment's history and can anticipate the need for part replacement before a failure occurs.
Key takeaways
The correct compressor bleeding procedure requires disconnecting the power supply, gradually releasing pressure, draining condensate, and subsequently checking for leaks and filter condition.
| Point | Details |
|---|---|
| Safety first | Before bleeding, always disconnect the power supply and release pressure slowly, a quarter turn of the valve at a time. |
| Compressor type determines the procedure | Screw compressors require separate venting of the oil and air circuits. |
| Condensate must be drained. | Water in the air receiver causes corrosion and contamination of the air. Collect and dispose of it properly. |
| Diagnostics before and after | Checking for air leaks and pressure values after venting detects faults before they cause a failure. |
| Quarterly maintenance extends service life | Replacing filters, checking valves, and adjusting bypasses reduce operating costs and increase reliability. |
Field experience: what technicians overlook most often
I have worked with compressors of various types and outputs for many years, and one pattern keeps repeating. Technicians handle venting well, but underestimate the inspection afterwards. They open the valve, wait for the pressure to drop, and go straight to the service work. Meanwhile, residual pressure in the oil separator or in the piping behind the discharge valve causes oil spray or a kickback when restarting.
The second thing that surprises me in practice is the absence of a service log. Without a record of the last venting and filter replacement, the technician makes decisions blindly at every service. He doesn't know when the separator filter was last replaced, or whether the safety valve was tested. That is not professional work. It is improvisation.
I also recommend not underestimating diagnostics before venting. If the compressor shows unusual noise, higher temperature, or a drop in output before servicing, that is a signal that the problem is not only related to the need for venting. Systematic compressor diagnostics detects leaks, worn valves, or clogged filters before they cause a costly failure. Venting is then part of the solution, not a substitute for diagnostics.
Last piece of advice: never use improvised tools to open the venting valves. A damaged valve or an incorrectly fitted wrench causes air to escape in an uncontrolled direction. The right tools are an investment that pays off the first time you perform a service intervention without complications.
— Zdeněk
Compressors and accessories for easy maintenance at Kompresory-vzduchotechnika.cz
Kompresory-vzduchotechnika offers a complete range for technicians and tradesmen who need reliable machines with simple maintenance.

For industrial applications, SCR screw compressors are available with integrated venting valves and service points designed for easy access. To keep compressed air clean after venting and filter replacement, we offer air treatment units that remove residual moisture and oil from the piping. The Kompresory-vzduchotechnika team also provides technical advice on selecting the right compressor and accessories for a specific application.
FAQ
What is compressor venting?
Compressor venting is the controlled release of residual pressure from the air tank, piping, and oil circuit before a service intervention. The goal is to ensure safe working conditions and prevent mechanical damage when opening the system.
When is it necessary to vent the compressor?
The compressor must be vented before any servicing work, filter replacement, valve inspection, or pipe repair. Venting is also part of the regular quarterly maintenance when draining condensate from the air tank.
How long does compressor venting take?
Venting itself typically takes 5 to 15 minutes, depending on the air tank volume and initial pressure. For screw compressors with a larger oil circuit, the process may take longer, as multiple circuits need to be vented separately.
What are the signs of improper venting?
Signs include a burning smell, unusual noise at startup, oil spraying out when opening the separator cover, or a pressure surge in the piping. These signs indicate that residual pressure remained in the system or that the oil circuit was not vented.
How often should the air compressor be bled?
Bleeding as part of condensate drainage is performed daily or after every working cycle for compressors in intensive operation. Complete bleeding before servicing is performed quarterly or during every scheduled service intervention.
Recommended
- The importance of compressor diagnostics for efficient operation - Kompresory-Vzduchotechnika.cz
- Avoid the most common mistakes when using compressors - Kompresory-Vzduchotechnika.cz
- Why compressor cooling is essential for operation - Kompresory-Vzduchotechnika.cz
- A list of safety rules for working with a compressor in automotive 2026 - Kompresory-Vzduchotechnika.cz